Body TUBE
|
| ||
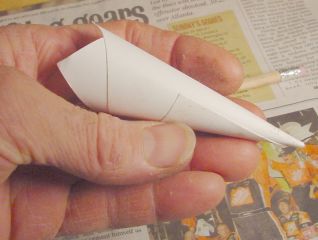
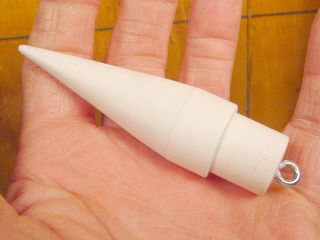
the Nose Cone
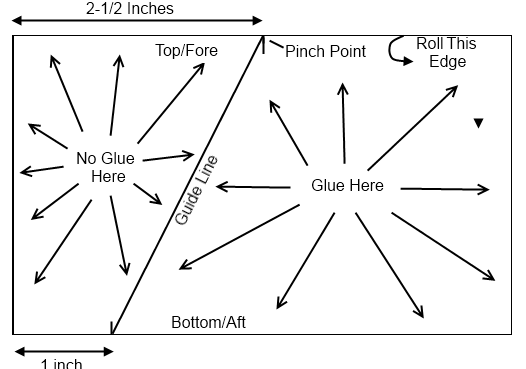
Create your index card so it looks identical to this. Instructions are below
|
| ||
Allow both parts to dry before doing next step
Nose Cone Pt. 2
|
| ||
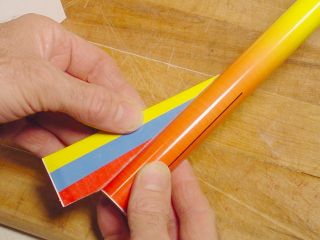
Body Cover
|
Use the link below to design your own body cover for the rocket. The red lines are used for three fins the blue are if you want four plans.
Share on Microsoft teams so Mr. Williamson can color print them.
| ||
Thrust Ring
|
The thrust ring is inside of the rocket and is used to make sure the rocket engine is not shot straight through the rocket. IT IS VERY IMPORTANT THAT THIS IS SECURE AND TIGHT INSIDE OUR BODY TUBE.
|
| ||
Launch Lug
Materials Needed:
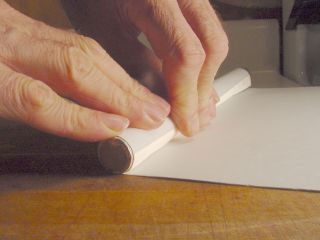
Cut a piece of scrap paper so it is about 3” x 4”.
Roll the scrap paper on the 3/16” dowel 2-3 times around and draw a line.
Unroll the paper and put glue on the larger side of the line. Be careful not to use too much glue, or it will soak through the paper and stick it to the dowel. Make sure you spread the glue all the way to the sides of the paper.
Roll the paper back onto the dowel as straight and tight as you can. Make sure the end sticks down. Remove it from the dowel and let it dry. Make sure you do not squeeze it as the launch lug must be able to fit the launch rod inside.
If you end up with wrinkles, or the paper not quite straight, the launch lug will still work as long as it is round.
Installing the Launch Lug
Find the fin that you put on the best. It does not have to be the prettiest fin, just the one that you put on the straightest. If you did a great job on all your fins then it doesn’t matter which one you pick.
Put a thin layer of hot glue on your launch lug and put it on your rocket so it is touching both the body tube and your straightest fin. The launch lug should not extend past the body tube, but it can extend past the fin.
Let the glue dry.
- 1 3 x 5 index card
- 1 – 3/16” or ¼” dowel, or something similarly sized, about 6” long
- Glue
- Hot Glue
Cut a piece of scrap paper so it is about 3” x 4”.
Roll the scrap paper on the 3/16” dowel 2-3 times around and draw a line.
Unroll the paper and put glue on the larger side of the line. Be careful not to use too much glue, or it will soak through the paper and stick it to the dowel. Make sure you spread the glue all the way to the sides of the paper.
Roll the paper back onto the dowel as straight and tight as you can. Make sure the end sticks down. Remove it from the dowel and let it dry. Make sure you do not squeeze it as the launch lug must be able to fit the launch rod inside.
If you end up with wrinkles, or the paper not quite straight, the launch lug will still work as long as it is round.
Installing the Launch Lug
Find the fin that you put on the best. It does not have to be the prettiest fin, just the one that you put on the straightest. If you did a great job on all your fins then it doesn’t matter which one you pick.
Put a thin layer of hot glue on your launch lug and put it on your rocket so it is touching both the body tube and your straightest fin. The launch lug should not extend past the body tube, but it can extend past the fin.
Let the glue dry.
FINAL STEPS
|
Parachute, shock cord and final touches
|
| ||
